Expenses
After adding some properties to your account, you can now proceed to expenses page and add expenses for a particular property.

Navigate and Actions
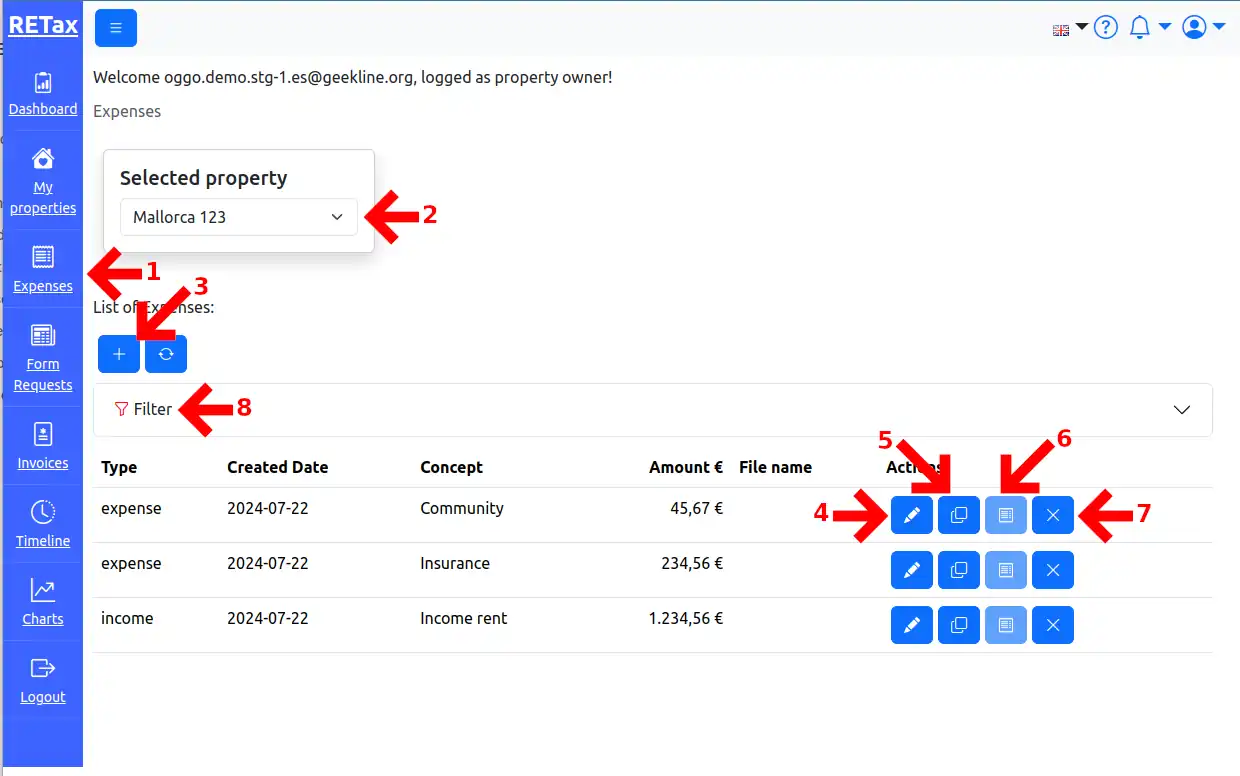
You can navigate to the Expenses view by clicking on the Expenses button (1) in the sidebar, as shown above. Use the Select property drop-down menu (2) to switch among your properties. Click the Plus button (3) to add expenses / income. Edit (4), Copy (5) and Delete (7) buttons can be used to manipulate the the expenses. If there is a receipt attached to the expense, you can view it by clicking on the View receipt button (6). Using the Filter (8) you can reduce the number of the displayed expenses for a certain period or by type.
New or edit

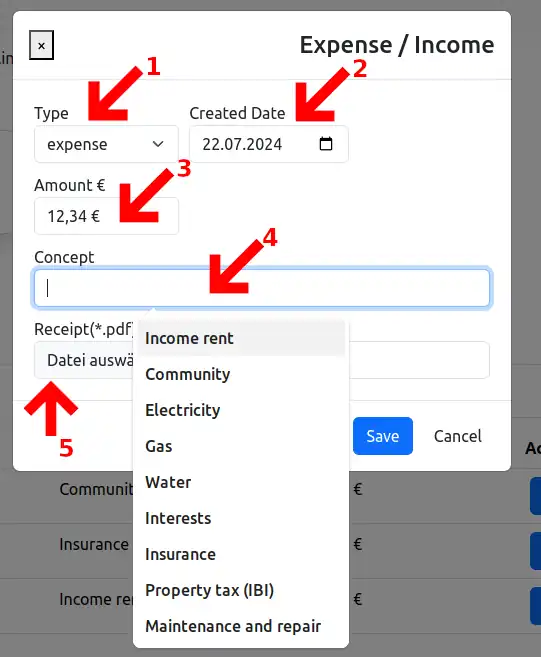
For every expense you can select the type (1), which can be expense or income.
TIP
Income is also part of the expenses.
Enter the date of the expense (2).
Be aware
Expenses with a date in the future are not supported by the system. You can add only expenses which are already happened.
A positive Amount (3) also must be set. You can add Concept (4) to structure better your income / expenses.
For every expense you can also attach a *.pdf file (5) in case you have some receipts or bills.